Add custom ticket views to widget
While HelpDesk has default views, you’re not limited to them.
You can add new views to categorize tickets in a way that makes sense for your team and your requesters.
Modify default views
When you create a new widget, you’ll see a couple of views to get you started. Think of these views as different tabs that organize and filter your tickets.
By default, you’ll see:
Active: Displays tickets that are currently open and need attention.
Solved: Displays tickets that have been closed.
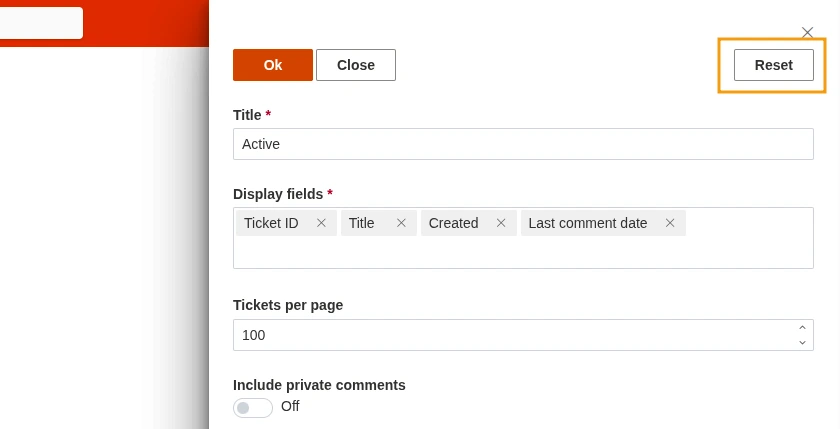
You can easily customize these views as needed following our guide.
And it’s safe to experiment! In case you edited one but then regretted the changes, just press the Reset button to revert it to its original form.
Don’t stop at modifying the default views, you can also create your own to see exactly what you need—for example, a view just for urgent tickets or sales-related issues.
Find more detailed information on filters, sort order, fields and scope in the sections below.
Add new view
To illustrate how to create a new view, let’s build one that displays only active tickets with the ‘Incident’ category.
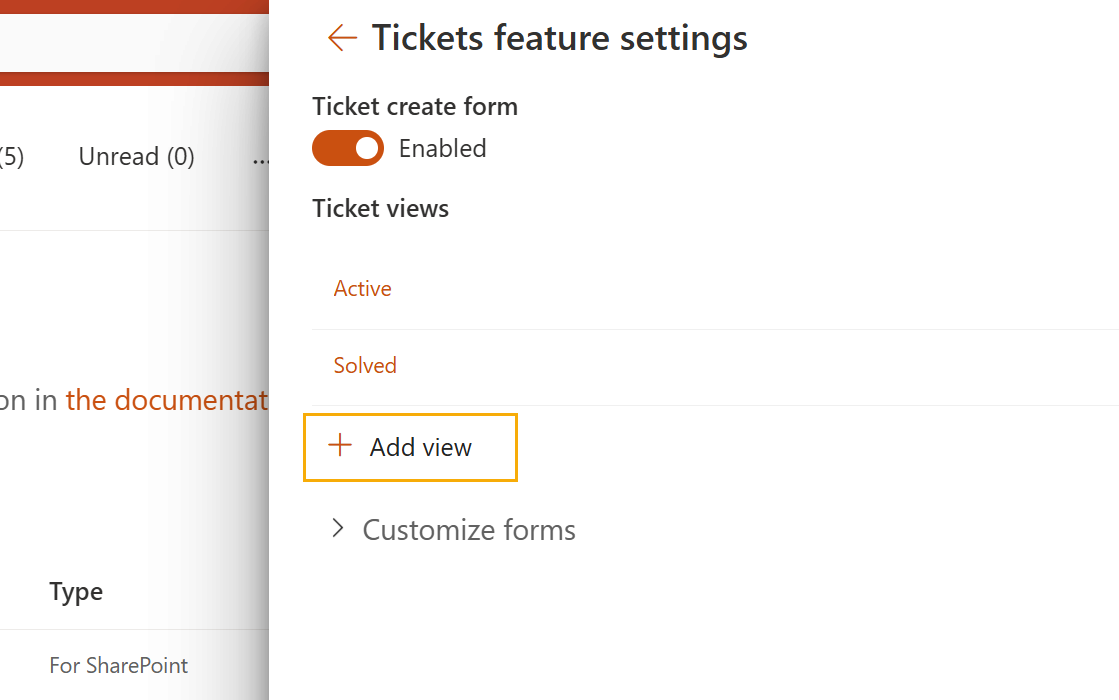
First, create a new widget and click Add view:
A new configuration form will open:
Fields and scope
Let’s use the Title field to name it “Incidents” and set the number of displayed tickets to 10.
Note
You can display up to 100 Tickets per page.
Next, we’ll specify which fields should be displayed in the view.
For this example, let’s assume the requester won’t need the ‘Created’ and ‘Last comment date’ fields, so we delete them from the Display fields.
Then, we’ll add the “CC,” “Due date” and “Category” fields, which we find helpful for our user case:

By default, we have the following settings in our view:
Include private comments: Initially disabled, meaning only public comments are allowed.
Include tickets in sub-folders: Initially, all tickets are included, regardless of which folder contains them.
For this last option, let’s disable it to exclude the archived tickets our team moved earlier to a different folder within the ticket list.
Sort order
By default, tickets are sorted from oldest to newest, but you can change it to save time and ensure users see the list in a consistent, logical way.
For example, we want to automatically sort our new view alphabetically based on the ‘Category’ value. This can also be done using other available fields, such as ‘Ticket ID’ or ‘Title’.

Filters
While most of our configuration has a user-friendly format and filling fields, the content of the Where element requires specific schema markup.
By using the CAML-query and placing its child elements there, we can control which tickets are displayed in the view.
The query can contain one of these tokens:
{{Me.ID}}—ID of the contact who is currently logged into the widget. The ID corresponds to an “ID” field on the HelpDesk “Contacts” list.{{Me.Email}}—Email address of the contact who is currently logged into the widget. The email corresponds to an “Email” field on the HelpDesk “Contacts” list.{{Me.Organization.ID}}—Organization ID of the contact who is currently logged into the widget.
In our case, we need to display the tickets raised by the current user that also have the “Incident” category.
First, let’s filter for tickets raised by a current user.
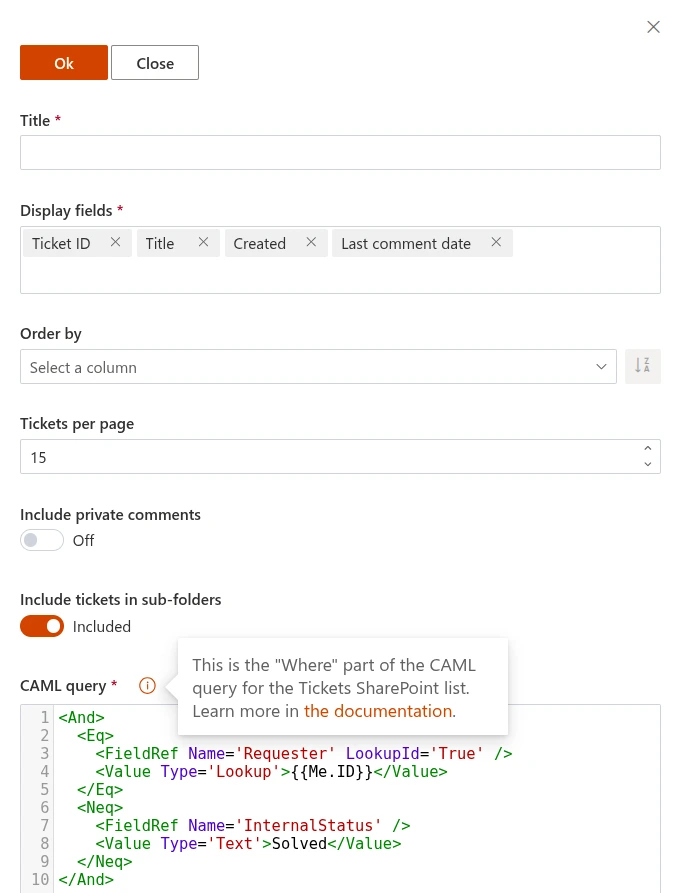
In the filter, we check whether the lookup field “Requester” refers to the user’s ID, so we leave the first part of the default query:
<Eq>
   <FieldRef Name='Requester' LookupId='True' />
   <Value Type='Lookup'>{{Me.ID}}</Value>
</Eq>
Then, we add another filter to include only tickets with the “Incident” category:
<Eq>
   <FieldRef Name='Category' />
   <Value Type='Choice'>Incident</Value>
</Eq>
Finally, we join both conditions with a logical operator “And”.
Our resulting configuration form will look like this:
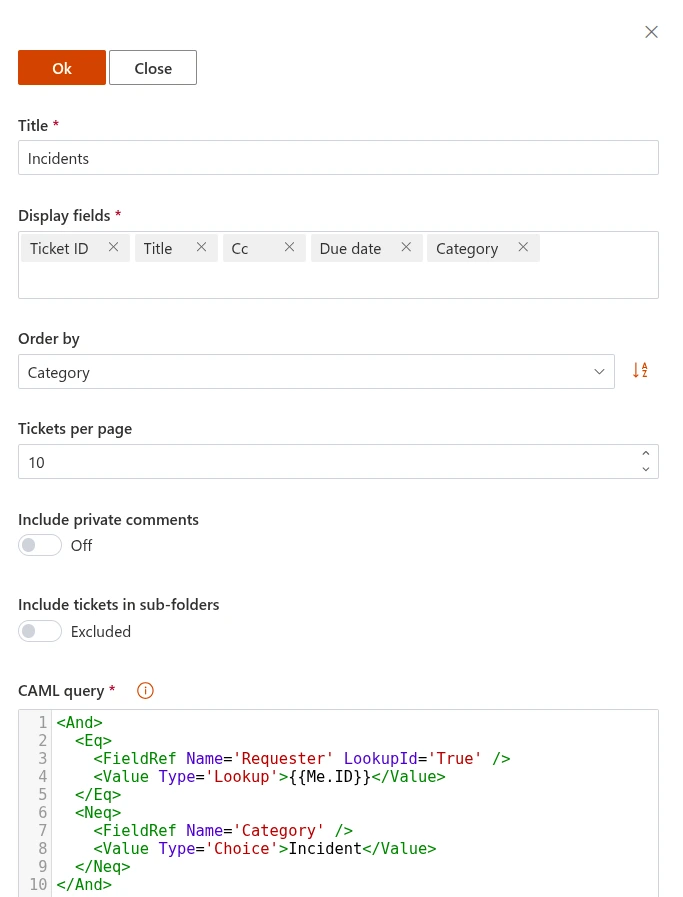
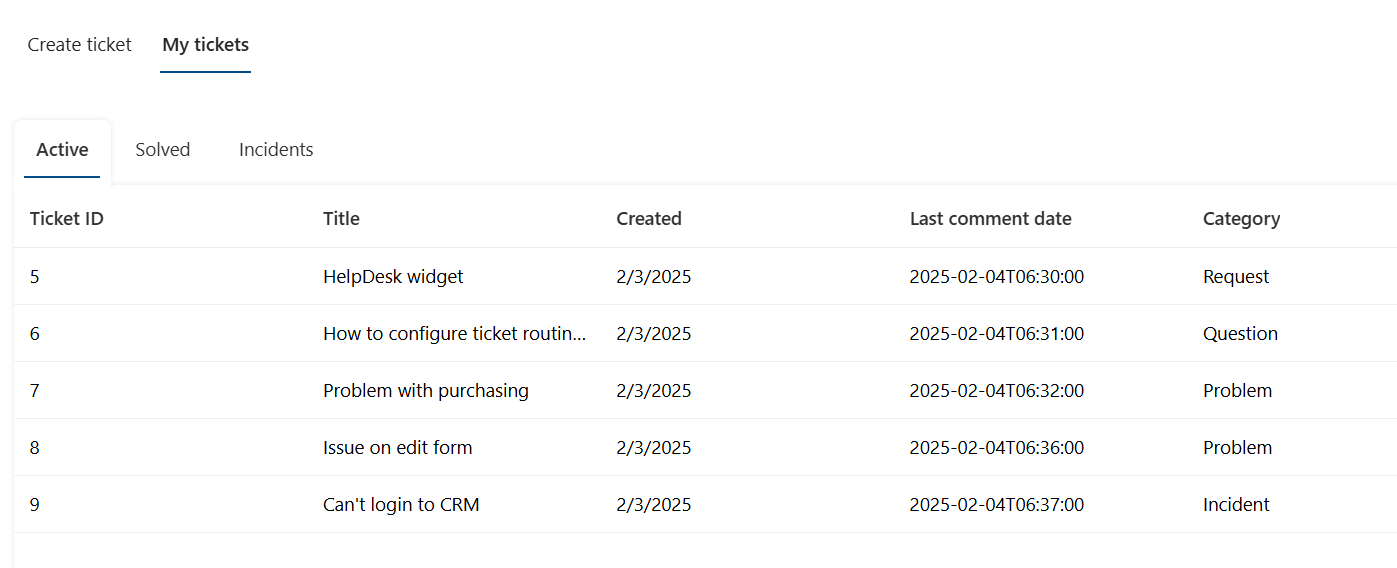
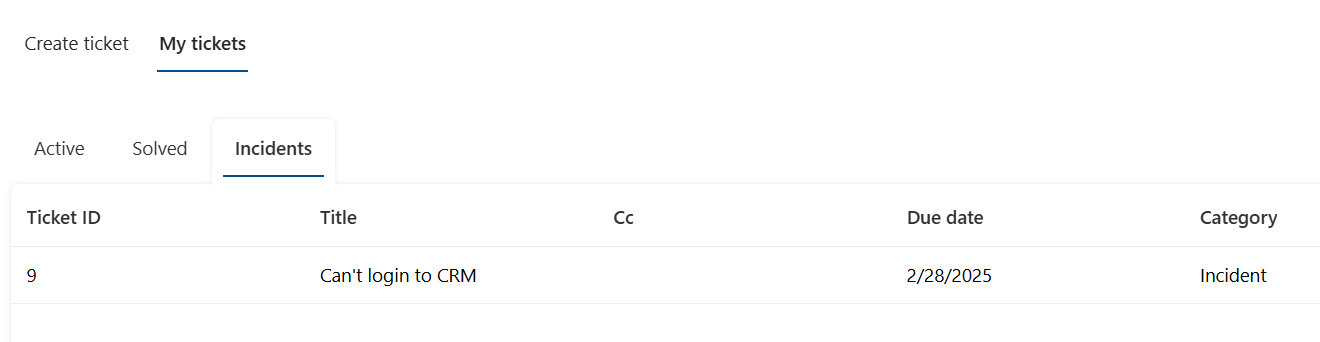
Thus, a user can see their incident tickets separately from others:
Use this example as a guide to create your own views, and users will appreciate convenient and clear communication.